
MyBatisのInterceptorで削除データロガーを実装する
2025/06/19

こんにちは、iOS エンジニアの伊藤です。
日々ネット上のエンジニアの方々にはお世話になっているので、自分も貢献したいという気持ちから、あまりネット記事に出てこない 【SwiftUI × CoreBluetooth】 について記事を書いていきます!
・View が簡単!( AutoLayout に踊らされない)
・コードが少ない!( TableView とさよなら)
今までの Swift × Bluetooth®︎ では、 UITableView と ReloadData ばかりで正直嫌でした笑。
しかし、 SwiftUI で書くことによって、 ViewController 肥大化が無くなり、圧倒的にコード量が減りました。
とてもすっきりと実装できるのでぜひ参考にしてみてください。
Xcode 12.4 (12D4e)
macOS Catalina 10.15.7
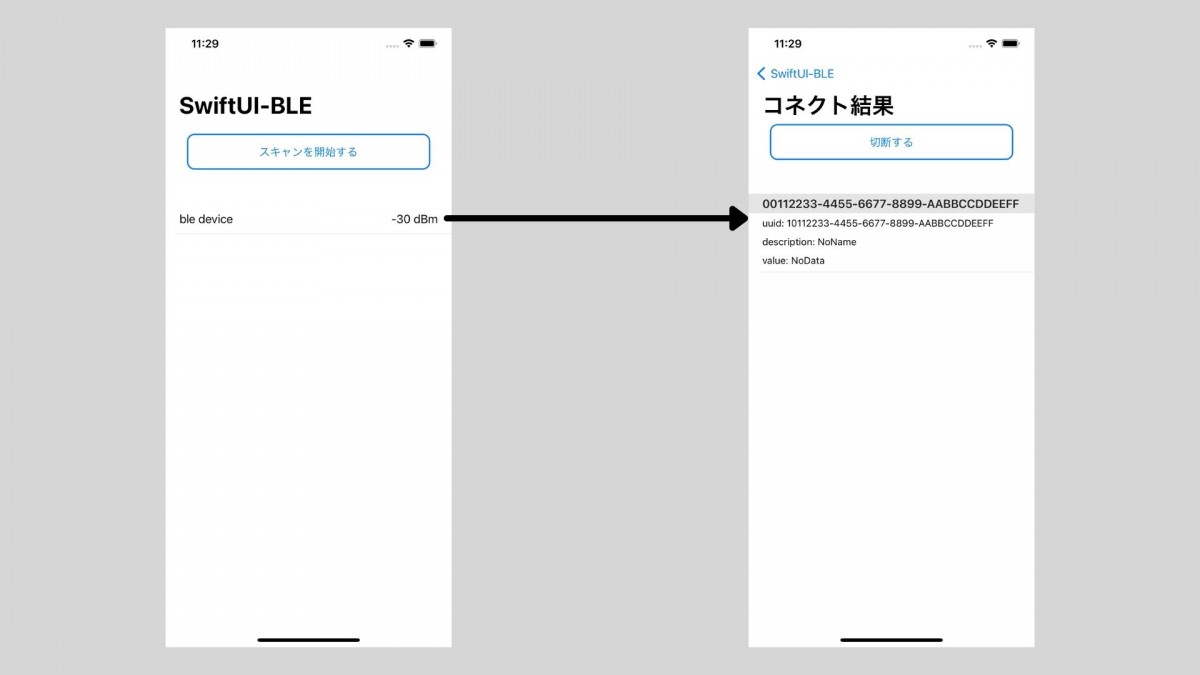
SwiftUI で作成した、Bluetooth®︎ LE 接続するアプリのサンプル画面です。
全体のコードはこちらにあります。
画面構成としては、
・スキャンしたデバイスを表示する画面
・接続したあと取得した Characteristic リストを表示する画面
・Characteristic リストから取得した値を表示する画面
となります。
ContentView のソースコードです。
struct ContentView: View {
    @EnvironmentObject var bluetoothManager: CoreBluetoothViewModel

    var body: some View {
        ZStack {
            //second stack
            VStack {
                NavigationView {
                    ScanListView()
                }
                .navigationViewStyle(StackNavigationViewStyle())
            }
            //first stack
            if bluetoothManager.isSearching {
                Color.gray.opacity(0.6)
                    .edgesIgnoringSafeArea(.all)
                ZStack {
                    VStack {
                        ProgressView()
                    }
                    VStack {
                        Spacer()
                        Button(action: {
                            bluetoothManager.stopScan()
                        }) {
                            Text("スキャンを停止する")
                                .padding()
                        }
                    }
                }
                .frame(width: 200, height: 200, alignment: .center)
                .background(Color.gray.opacity(0.5))
            }
        }
    }
}
@EnvironmentObject var bluetoothManager: CoreBluetoothViewModel
上記の宣言を行うことで、 SwiftUI の View はこのクラスを監視される様になります。
クラス内の @Published で宣言された変数が変更・更新される度に、 View が常に最新の値を用いて画面を作成します。
ContentView では、モーダルの View を作成し表示する様にコードを書いていますが、
EnvironmentObject である、 bluetoothManager.isSearching が true となっている間だけ表示されます。
.navigationViewStyle(StackNavigationViewStyle())
上記の Modifier では、iPad でも iPhone と同様の画面表示できる様に宣言しています。
(※ついでに List と他のViewを組み合わせた時に発生する謎の余白も出なくなります。)
ポイントとなる ScanListView です。
struct ScanListView: View {
    @EnvironmentObject var bluetoothManager: CoreBluetoothViewModel

    var body: some View {
        VStack {
            NavigationLink("", destination: ScanDetailView(isRootViewActive: $bluetoothManager.isConnected),
                           isActive: $bluetoothManager.isConnected)

            Button(action: {
                if bluetoothManager.isSearching {
                    bluetoothManager.stopScan()
                } else {
                    bluetoothManager.startScan()
                }
            }) {
                UIButtonView(text: bluetoothManager.isSearching ? "スキャンを停止する" : "スキャンを開始する")
            }

            Text(bluetoothManager.isBlePower ? "" : "Bluetooth® 設定がOFFです")
                .padding(10)

            PeripheralCells()

            .navigationBarTitle("SwiftUI-Bluetooth® LE")
        }
    }

    struct UIButtonView: View {
        var text: String

        var body: some View {
            Text(text)
                .frame(width: 350, height: 50, alignment: .center)
                .foregroundColor(Color.blue)
                .overlay(
                    RoundedRectangle(cornerRadius: 10)
                        .stroke(Color.blue, lineWidth: 2))
        }
    }

    struct PeripheralCells: View {
        @EnvironmentObject var bluetoothManager: CoreBluetoothViewModel

        var body: some View {
            List {
                ForEach(0..<bluetoothManager.foundPeripherals.count, id: \.self) { num in
                    Button(action: {
                        bluetoothManager.connectPeripheral(bluetoothManager.foundPeripherals[num])
                    }) {
                        HStack {
                            Text("\(bluetoothManager.foundPeripherals[num].name)")
                            Spacer()
                            Text("\(bluetoothManager.foundPeripherals[num].rssi) dBm")
                        }
                    }
                }
            }
        }
    }
}
ScanListView でも同じ様 EnvironmentObject にて監視しています。
NavigationLink("", destination: ScanDetailView(isRootViewActive: $bluetoothManager.isConnected),
isActive: $bluetoothManager.isConnected)
この NavigationLink が Viewの中に書かれていることによって、Bluetooth®︎ LE接続が確立した時に次の画面へ自動で遷移することができます。
(もう prepare なんて書かなくていいんですよ〜笑)
更に isActive の値が false になった時に自動で前の画面に遷移することもできる様になるため、この書き方がおすすめです。
特に今までの ViewController でしたら値渡して...の様な考えも必要でしたが、 SwiftUI では監視したい値、必要な値は EnvironmentObject で宣言しておけば良いので、 View に余計なコードを書かなくてよくなります。
これだけで View だけでも、早く SwiftUI にしたいと思いませんか ?
グッバイ Storyboard !! さよなら AutoLayout !!
次回の記事で Bluetooth®︎ LE 通信部分をやりたいと思います !


